Connecting a classic (ADB) Apple keyboard to a modern (USB) PC using a regular Arduino
When I saw this person building a Raspberry Pi inside a vintage Apple Keyboard, I thought it could be a comfortable way to play Apple II games on a TV. More important, I happen to have an Apple Extended Keyboard II just waiting for such an experiment…

My winter holiday plans did not include going outside, so I wanted to build it with parts I already had. But the hack uses an Arduino Pro Micro (with a little help of the TMK Keyboard Firmware Collection) as a converter between ADB (the interface used by the Apple IIGS and older Macs) and the familiar USB, and I only had a regular Arduino (actually, a Leonardo-compatible clone).
I wasn’t sure that would do the job, so before tearing the keyboard apart, I decided that my first experiment would be an attempt to connect it to my computer.
To connect the Arduino to the keyboard, I could have cannibalized an S-Video MiniDIN-4 cable, since ADB uses the same connector. But I ended up using breadboard jumper wires, because they can be easily plugged on the Arduino and inserted straight into the ADB jack holes.
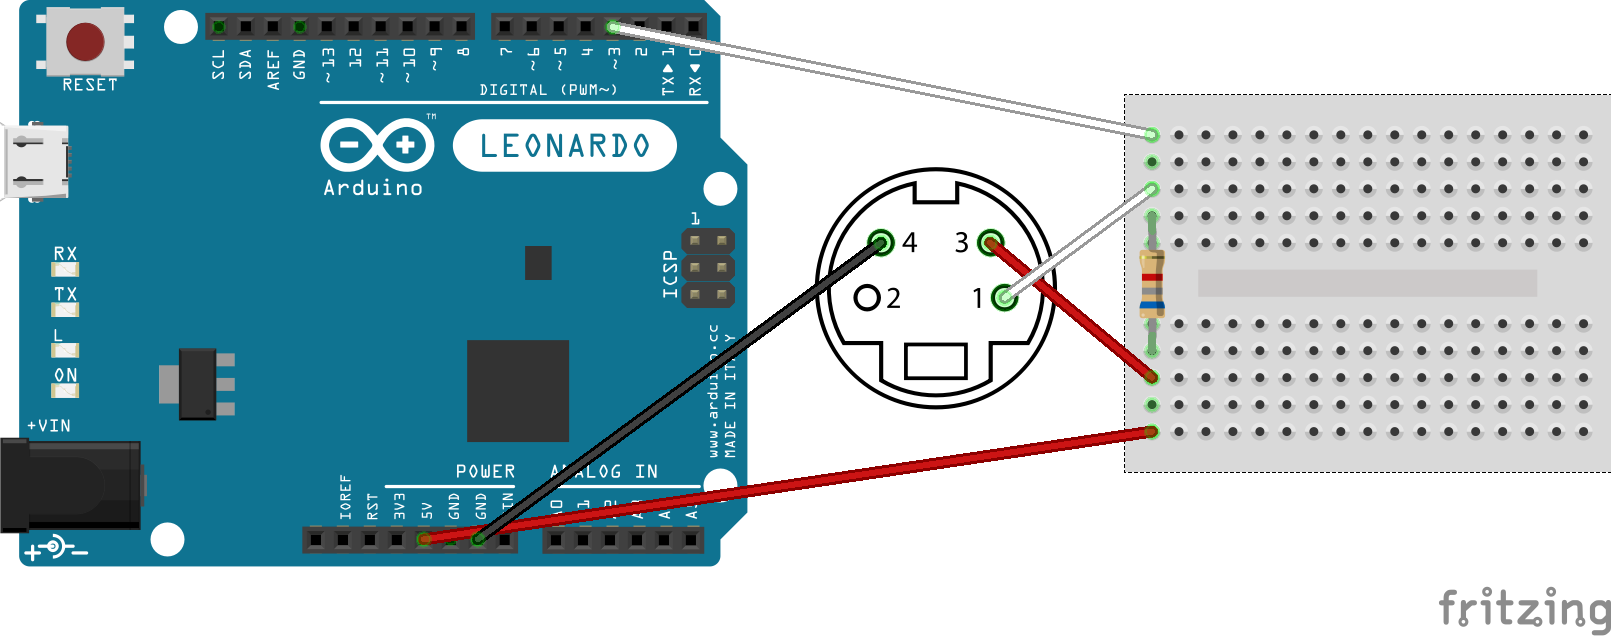
The TMK ADB-USB wiring instructions suggest a pull-up resistor. I used a 6K8Ω (the first one I found within the recommended range) and a mini-breadboard to organize the connections. Here is how I wired it:

I wasn’t sure which (if any) of the .hex files on the binary/ folder would work, so I built my own. You can download it here, or build (on a Mac with Homebrew) with:
brew tap osx-cross/avr
brew install avr-libc avrdude
git clone https://github.com/tmk/tmk_keyboard
cd tmk_keyboard/converter/adb_usb
At this point, edit the Makefile, changing MCU to atmega32u4 and TARGET to adb_usb_leonardo (or any name you want), then:
make -f Makefile clean
make -f Makefile

Now you should have a binary (adb_usb_leonardo.hex). To install it on the Arduino, use this command (pushing the RESET button on the board right before you hit ENTER):
sudo avrdude -patmega32u4 -cavr109 -P/dev/cu.usbmodemFD121 -b57600\
  -D -Uflash:w:adb_usb_leonardo.hex:i
The device (cu.usbmodemFD121) may be a bit different for you (you can check the right name with the Arduino IDE). You will know it worked when you get a few progress bars, then something like avrdude: 20528 bytes of flash verified. At that point, the computer should “see” your Arduino as a USB keyboard.
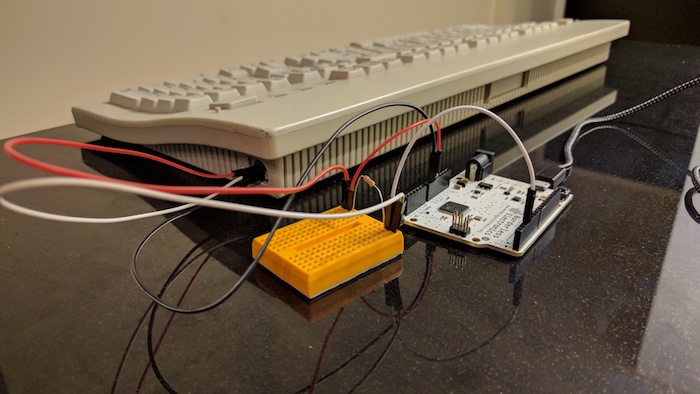
It took me some time to figure out the build and install, but the hardware part worked without a hitch. With due apologies for the narration (I was pretty tired), you can see it in action here: https://youtu.be/qT-lE_H3v2w